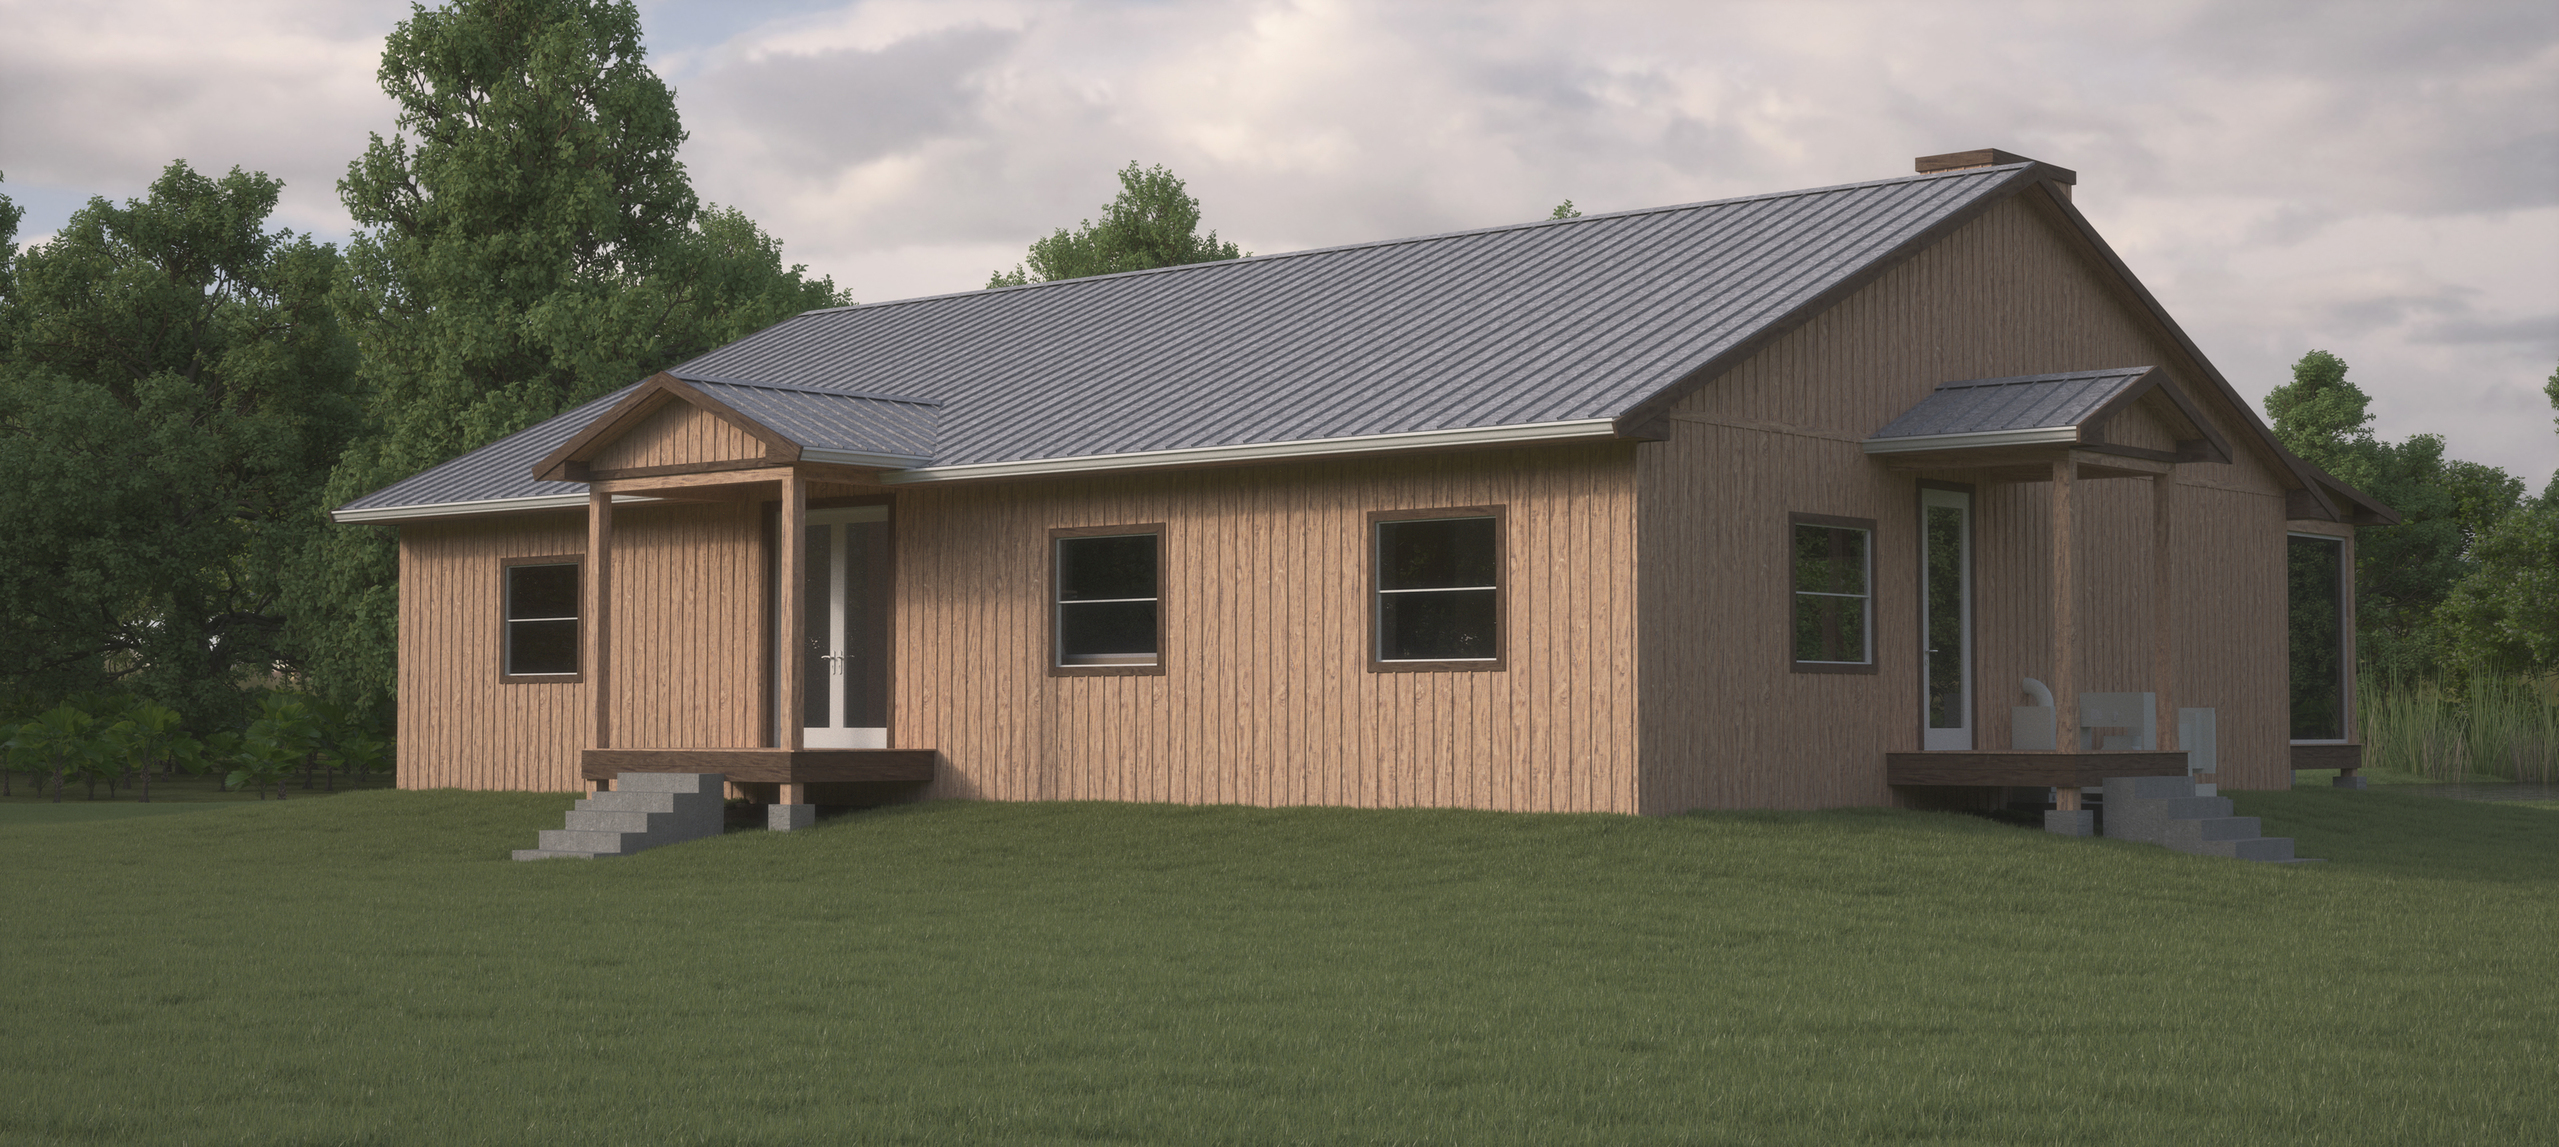
I am looking for some information/suggestions on Skatter Workflows. I use Skatter quite a bit, but for basic grass setup. Some of the projects I have been working on lately have a need for more elaborate environment and I feel a little lost when it comes to achieving a complex Skatter setup. Is there a good workflow/organization method for this? Here is an image of a recent project I did:
I ran out of time playing with the settings and had to revert to doing just do this basic UNIFORM grass setup. This is how 90% of my renders turn out and it kills me. I wanted to have taller grass in some areas near the house and to have areas that fade out into dirt (under the porch) and a dirt trail driveway leading up to the house. I wanted a more natural look overall but just ran out of time. I feel like I can never achieve this.
All that being said, I would love any videos, articles, tutorial write-ups, or any suggestions on how to take my Skatter skills to the next level. Sorry for the long post. Thanks in advance.
I’ll try to give you a few suggestions, as I feel I understand what you’re asking for.
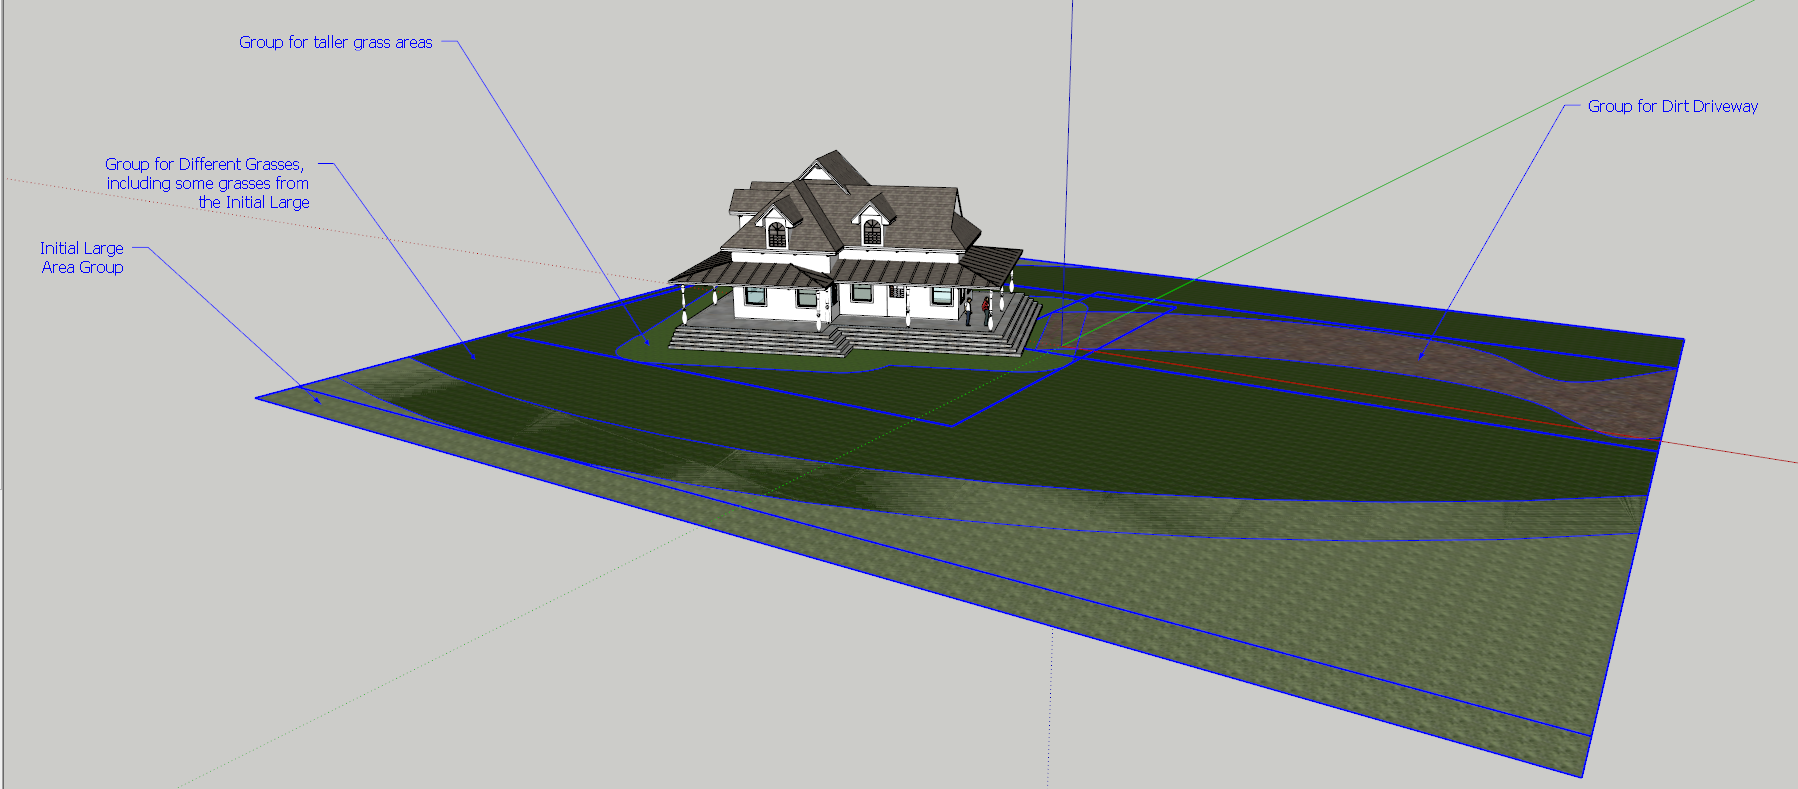
The best way to get differentiating Scattered objects blending well yet controlled by specific areas is to separate your initial large area into smaller groups.
Start with the large area and turn it into a group and then use Bezier Spline curves or arcs to create smaller groups from areas carved out of it… you can let these overlap so that the scattered items blend into each other. The Key Word here is “Groups” - select the areas you want to Host the Scattered objects and turn them into groups. Make New Render Lists using the Render list tab for each of these groups
So, you could create the dirt driveway you want to lead up to the house by simply creating that area, giving it a base dirt material and selecting it, then turning it into a group to use as a Host in a New Render List. Select items like gravel, sticks, loose leaves, etc. as the Scattered objects and the dirt driveway area group as the Host. Do the same with smaller areas for the dirt patches under the porches that you described.
Lastly, experiment with Density Falloff and Scale Falloff to get the blends looking the way you want them to.
Actually I have not read through the manual. I didn’t know there was one. I definitely will now though.
I am really just trying to find a good way to organize the different Skatter Objects Groups into a system that is easy to edit and looks good. As well as trying to get my grass and dirt and everything else to look more natural. Thanks a bunch. Sorry for the late reply.
Awesome! This helps a lot. I have been trying to do it solely from a couple of large grid like groups. I have tried playing with the Scale and Density falloff and usually end up not understanding quite how it works (before I knew about the manual) so I would just give up. But this will definitely going on the right track. Do you have any SketchUp files with a somewhat complex Skatter setup you wouldn’t mind sharing that I could dissect. Even if it is the file from your Image. If you need to you can delete the house or anything else or anything else you don’t want shared or just replace it with a simple box. If you can’t, don’t want to, or just don’t have time, I will understand completely. I already appreciate the advice you have provided. Thanks a bunch.
I’m fine with sharing the house with you, but please don’t use it commercially without my consent. You may use the grasses commercially if you wish. The rest of the scattered items are from the Skatter Library.
Things of note:
Use an infinite plane as the ground. If you don’t have a render engine that will support infinite planes, use a large rectangle as a ground plane. The important thing is that whether it’s infinite or not, use a good base material for the ground, as this will inevitably peer through grasses.
Hide all the Host groups from the render by putting them on hidden layers, unless they have your intentional base materials applied because, again, they will show between blades of vegetation. Also, sometimes Skatter will produce visible original components when selecting from the Skatter Library… just unlock these and hide them as well by using hidden layers, if they are not desired.
If you toggle the House Layer on and off, you’ll notice that there is a cut-out in the shape of the base of the house… it’s easier to do this than to make Skatter avoid the house.
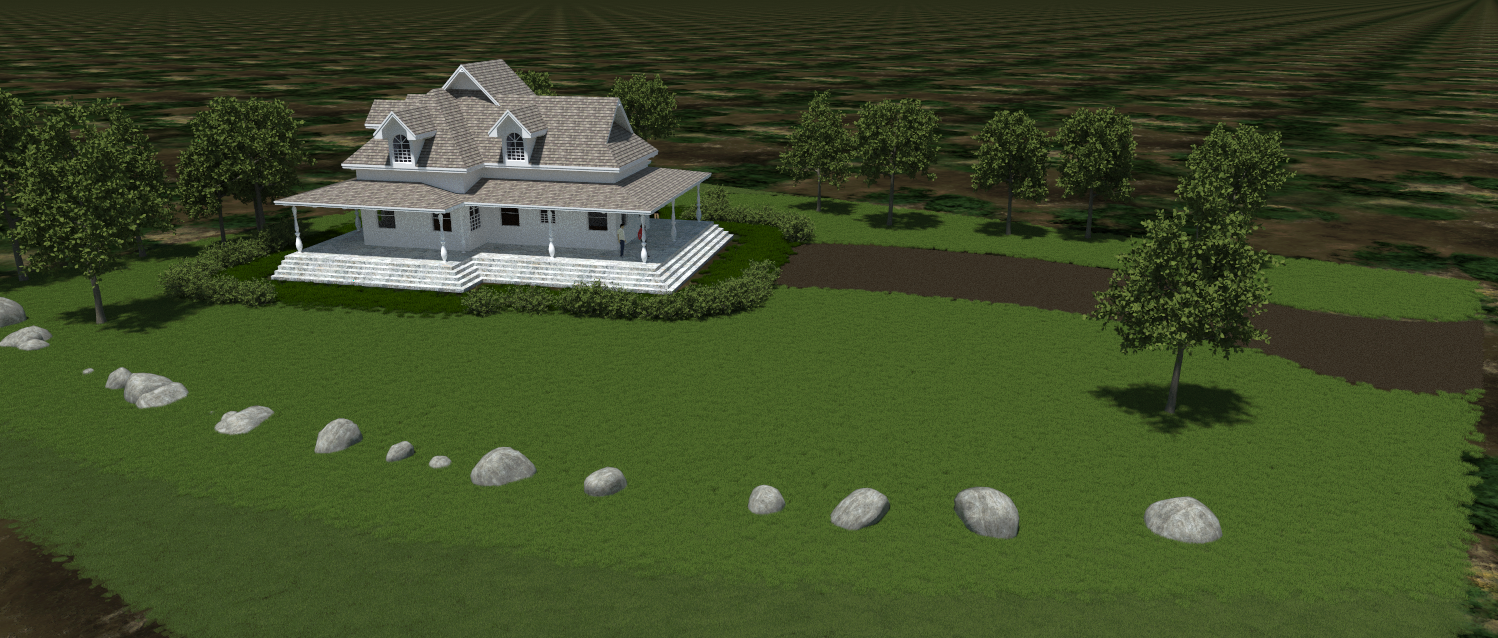
Don’t forget about using a Grouped Curve or Picked Points as Host types… I produced the bush hedges and trees by using points (which really don’t need a host selected) and used a Grouped Curve as the Host for the boulders.
To advance your skills, try making terrains to use as Hosts by using the Sandbox tools and the Soap Skin plugin (tutorials all over You Tube)… terrains will produce more natural-looking scatterings than flat planes. As for the density and scale fall-offs, just experiment until you have it down; I didn’t spend much time on fall-offs for this example.
Thank you so much. This will definitely help me get a better idea of how to set my stuff up. I really really appreciate your help and resources. I will try and remember to post pictures a little down the road of my Skatter progress. Thanks again. Your are awesome.