Thea Proxies Workflow

Hello all.

I am working with Thea proxies for a long time now and am wondering if my workflow could be improved…

What I usually do:

  1. EXPORT FROM 3DSMAX:
    Open the model in 3dsmax and convert the materials (usually Vray or Corona) to standard (delete the double-sided, falloff, color correction nodes mainly, often simplifying the shaders).

Export as FBX (this creates a material maps hierarchy that is most faithful as the FBX provided by commercial models libraries tend to lose the link to the bitmaps and the models lose the UVW or render white)

  1. SKETCHUP/TRANSMUTR:
    Import the FBX via Transmutr (usually Y up and CM as units), with the option to generate a Thea proxy of course (.mod.thea).

Here I don’t mind the .skp generated by Transmutr.

  1. SKETCHUP/THEA:
    Open the generated Thea proxy (.mod.thea) via the Thea Tools’ “Open or Edit a Thea model” command and tweak the materials (if the default thea materials generated by Transmutr doesn’t give complete satisfaction, that is).

I usually do this to be able to save my materials. As the models in a library often contain several variants of a plant - for instance - and it’s convenient to be able to drag and drop pre-edited materials from Thea’s material browser.

Then for the other variants of the same plant, I just swap the materials. Then I save the .mod.thea.

Open the Thea Browser and drop the newly edited .mod.thea in sketchup’s viewport.

In a frontal view, zoom extent on the mesh and render the view with alpha render element on.
Save the image as PNG. This will be used as a billboard.

  1. PHOTOSHOP (or Gimp):
    open the PNG and trim the image to crop only transparent pixels. overwrite the PNG

  2. SKETCHUP
    draw a rectangle on the front face of the bounding box and import the PNG as texture on it, scale to fit the face. the transparency of the PNG makes a perfect billboard.
    Make sure to paint both faces identically (the backface and frontface).

Move the face to the origin (I used to make it “face to the camera” but now I prefer avoid it to be able to see the orientation better when skattering).

Select All (the billboard face plus the Thea proxy bounding box) and make a component with the name of the proxy and .mod added.
Use TIG’s Originate Components Axes to make sure that the compo’s axis are correctly centered.

Use a frontal view, zoom extent again and save the component in the same folder as the .mod.thea

END


Now I know this is a lot of work, and could be streamlined if I knew how to code…

For instance, I’d like Transmutr to be able to affect materials of an imported model from a folder containing identically named materials (.mat.thea).
Previously I used Thea Studio but now it’s not Thea v2 compatible anymore. Perhaps the Studio version allows for these features?

It would be handy if Transmutr was able to render the billboard itself (as was proposed in the roadmap earlier) of course, but this would need a direct connexion to the renderer and I understood that Altair doesn’t provide the SDK for this kind of purposes.
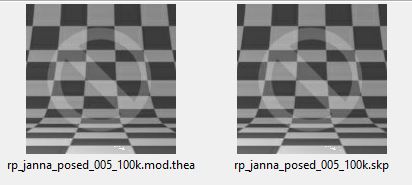
SKP outputs generally aren’t as explicit as the colors often differ from the SKP and THEA and one of my aims is to use the thumbnails to get a sense of color information.

Thanks for reading :wink:

2 Likes

This is already on our todo list.
If you are curious, it was discussed here: Thea Render Forum - Login
I have no ETA for this feature, though.

Transmutr Studio? Not directly, but if you were into scripting, the Command-Line Interface could prove useful.

Indeed, we don’t have access to a Thea SDK. The feature we are planning will generate the billboard, but not from SketchUp. It will either use the WebGL preview in the Transmutr UI, or a very simple renderer (but it will likely support only diffuse and opacity, so it might not match the Thea render look).

1 Like

Merci beaucoup Thomas!

1 Like

I would like to have an option in Thea to generate billboards automatically, but this still will have to wait.

2 Likes

This would be great indeed! Thanks Tomasz.

BTW it would be great to include in Transmutr the possibility to generate a low poly textured skp as a proxy .mod.skp next to the .mod.thea. (mostly for people)

I do it manually by decimating the fbx/obj mesh to around 8-15k faces in Transmutr or in 3dsmax (which adds a step in the worflow) but it’s way more explicit in my SKP models than having just pointclouds or bounding boxes to play with.

This way, I can check visually if my sitting people are correctly placed on the chairs, staircases, etc. without having to render each time.

You can already do that.

  • Set the “Mesh Simplification” slider to 95% or whatever you want.
  • Enable “Export as Thea Proxy”
  • Set “Placeholder” to “Simplified geometry”

The .mod.thea will be full geometry, but the placeholder will be simplified and textured.

1 Like

OK, I’ve tried that.
It half-works. I can indeed generate a decimated lowpoly skp, which renders as full geometry in Thea.
But in thea browser, I see no skp thumbnail attached to the thea proxy.
thea test

And there are a redundancy (the skp and the mod.thea, side by side whereas with my workflow I only see one occurency, the mod.thea with 2 thumbnails - the skp thumbail embedded within the thea thumbnail).

How can I solve this? I’d like Transmutr to automatically save the lowpoly skp with “.mod.skp” as file extension, so that thea browser recognize it as a “cart” proxy skp along the mod.thea …
When I add “mod” to the filename manually, the mod.thea gets renamed too, which gives mod.mod.thea file extension and therefore the saved mod.skp doesn’t get recognized as the proxy of mod.mod.thea file. I know, complicated… :smiley:
When I manually remove the “mod.” from the mod.mod.thea filename, the mod.skp gets correctly recognized as a proxy. But its thumbnail is black.

thea test 2

One thing I noticed too, is that the generated low poly skp is barely light in terms of filesize… In my example, the mod.thea weighs 4.7Mb and the skp weighs 7.8Mb. This is because the diffuse map texture is embedded within the skp and the diffuse is a 8k jpg, weighing 6Mb alone. My own lowpoly proxy skp files weigh between 0.3 and 2Mb. This is because I use a resized version of the diffuse map that is used for rendering purposes.

So in my whishlist, could Transmutr also resize the embedded diffuse map when saving the proxy low-poly skp file? Usually diffuse maps for 3d people are between 2k and 8k. 8k is overkill for my usage so I generally tend to resize manually to 2k or 4k before affecting them to their slots (diffuse, roughness and normal)… But for the proxy skp, I use a 512x512 or 1k version. This way, it could generate lighter proxy skp, both in terms of geometry complexity and texture size. Possible?

BTW this is how I sort my thea plant proxies (always evolving library):


Note that this is an old skp file, nowadays I’ve split the file between bushes, waterplants, trees, vines, flowers, etc. because there was no interest to have them all in the same file anymore…
Anyway, I need my thumbnails to be very low res, otherwise my skp memory footprint will explode. It would be great to be able to have very small ones( or be able to setup custom sizes)…

2 Likes

Thomas, is it possible to include, in the Materials section of Transmutr, a slider for Roughness?
It seems that the actual Relection slider translates in a mix of Roughness and Reflectance in Thea.
I often use Falloff procedural in the reflectance slot as well. If possible, could you include this option too?

Another suggestion,
Could it be possible to configure some presets as buttons, next to the Load ans Save Icons? It would be simpler to access them.

Yes this is planned for a future version.

I guess we could have a button to load the last preset, or a pre-defined one.
We have planned to add an option for a default preset (Transmutr would open with this preset already loaded), would it be enough?

A default (customizable) preset is fine, as a ‘by default load the last used preset’ option could be nice too. It would avoid having to select the preset button each time, indeed.

1 Like

Hello Thomas,

could you please explain step by step how you made this nusery of plants?
This would be very useful for my workflow with V-ray.

I am unable to use the various proxy methods as descibed on the transmutr website. Everytime I export my file is exported with face skipping regardless of the placeholder that has been seleced.

Can the files be copied and pasted into another file? Can you explain the Billboard file path? Lots of questions, thanks in advance. David

Basically, I generate a proxy with Tranmutr or the classic way with Thea. This generates a .mod.thea file and along with it, a corresponding skp file with a box showing the bounding box of the object.

Then I import this skp file into a master skp file that I use to create template rendered plates (with correct HDR and camera settings).

I quickly render the imported object (finetuning materials along the way), and save it as transparency enabled PNG. Btw it’s useless to create huge render resolutionwise as it just uses more memory. 600px high image is plenty enough (perhaps even already too much).

In Photoshop, I crop the tranpsparent pixels and overwrite the PNG.

Back into Sketchup, I paste the PNG as a texture on the box (you need to create one face on the imported box before btw), resize the PNG to fit the face (if PS cropped the transparency correctly the PNG fits perfectly the face).

I select and move the face to the origin of axis XYZ(0,0,0) and convert the face to a face-me component, and then save the SKP with the name filename.mod.skp alongisde the filename.mod.thea proxy file (in the same folder).

Be careful with the textures folder location (the ideal would be that every needed texture would be in the same folder but it’s not always possibel or practical).

Then import the created .mod.skp compo into a nursery skp file. If you have too many objects in this masterfile and SU starts to get sluggish, try a script that would reduce the resolution of the bitmaps or simply separate some of the objects into smaller groups (and files).

1 Like

I’ve noticed a difference of Thea Proxy handling between individual file conversion vs CLI (Command Line Interface) batch conversion with Transmutr Studio.
When I do a single file conversion, Transmutr generates a *.mod.thea file which allows me to tweak the materials afterwards. When doing a batch CLI conversion, it outputs only thea.xml with folders (one for each file), and it’s a pain to manage…

Yes, this is expected behavior. Although I agree that it is not ideal.
Unfortunately we cannot do better. It is related to the way the *.mod.thea are generated.

What happens is that Transmutr creates the *_thea.xml and *.mesh.thea files. Then it asks Thea to convert those to *.mod.thea. But for this to work, Transmutr needs a way to talk to Thea. The only way is when you start Transmutr from within SketchUp with Thea installed.

When you run a batch CLI conversion, Transmutr doesn’t run in SketchUp, and has no way to talk to Thea. Therefor it’s not able to convert to *.mod.thea.

.mod.thea is a proprietary, closed, and binary format. There is no way for us to generate it directly.

1 Like

I see… you mean this workflow works with Enscape and Vray, but not thea?

The way we generate files with Enscape and V-Ray is different.
Enscape uses plain .skp files (although in Transmutr v2 we will be able to generate native Enscape assets), and V-Ray uses .vrmesh files which we can generate thanks to a standalone tool shipped with V-Ray, called ply2vrmesh.exe.
For Enscape and V-Ray, there is no need for Transmutr to be launched from SketchUp.

1 Like

OK, this explains why Transmutr doesn’t generate the .mod.thea file UNLESS I launch Thea Render under Sketchup firsthand… :smiley:
You could add a warning to recommend launching Thea before creating Thea proxies :smiley:

2 Likes